vesuveus ready! - GITHUB + Typing Test

Hello fellow keyboard enthusiasts!

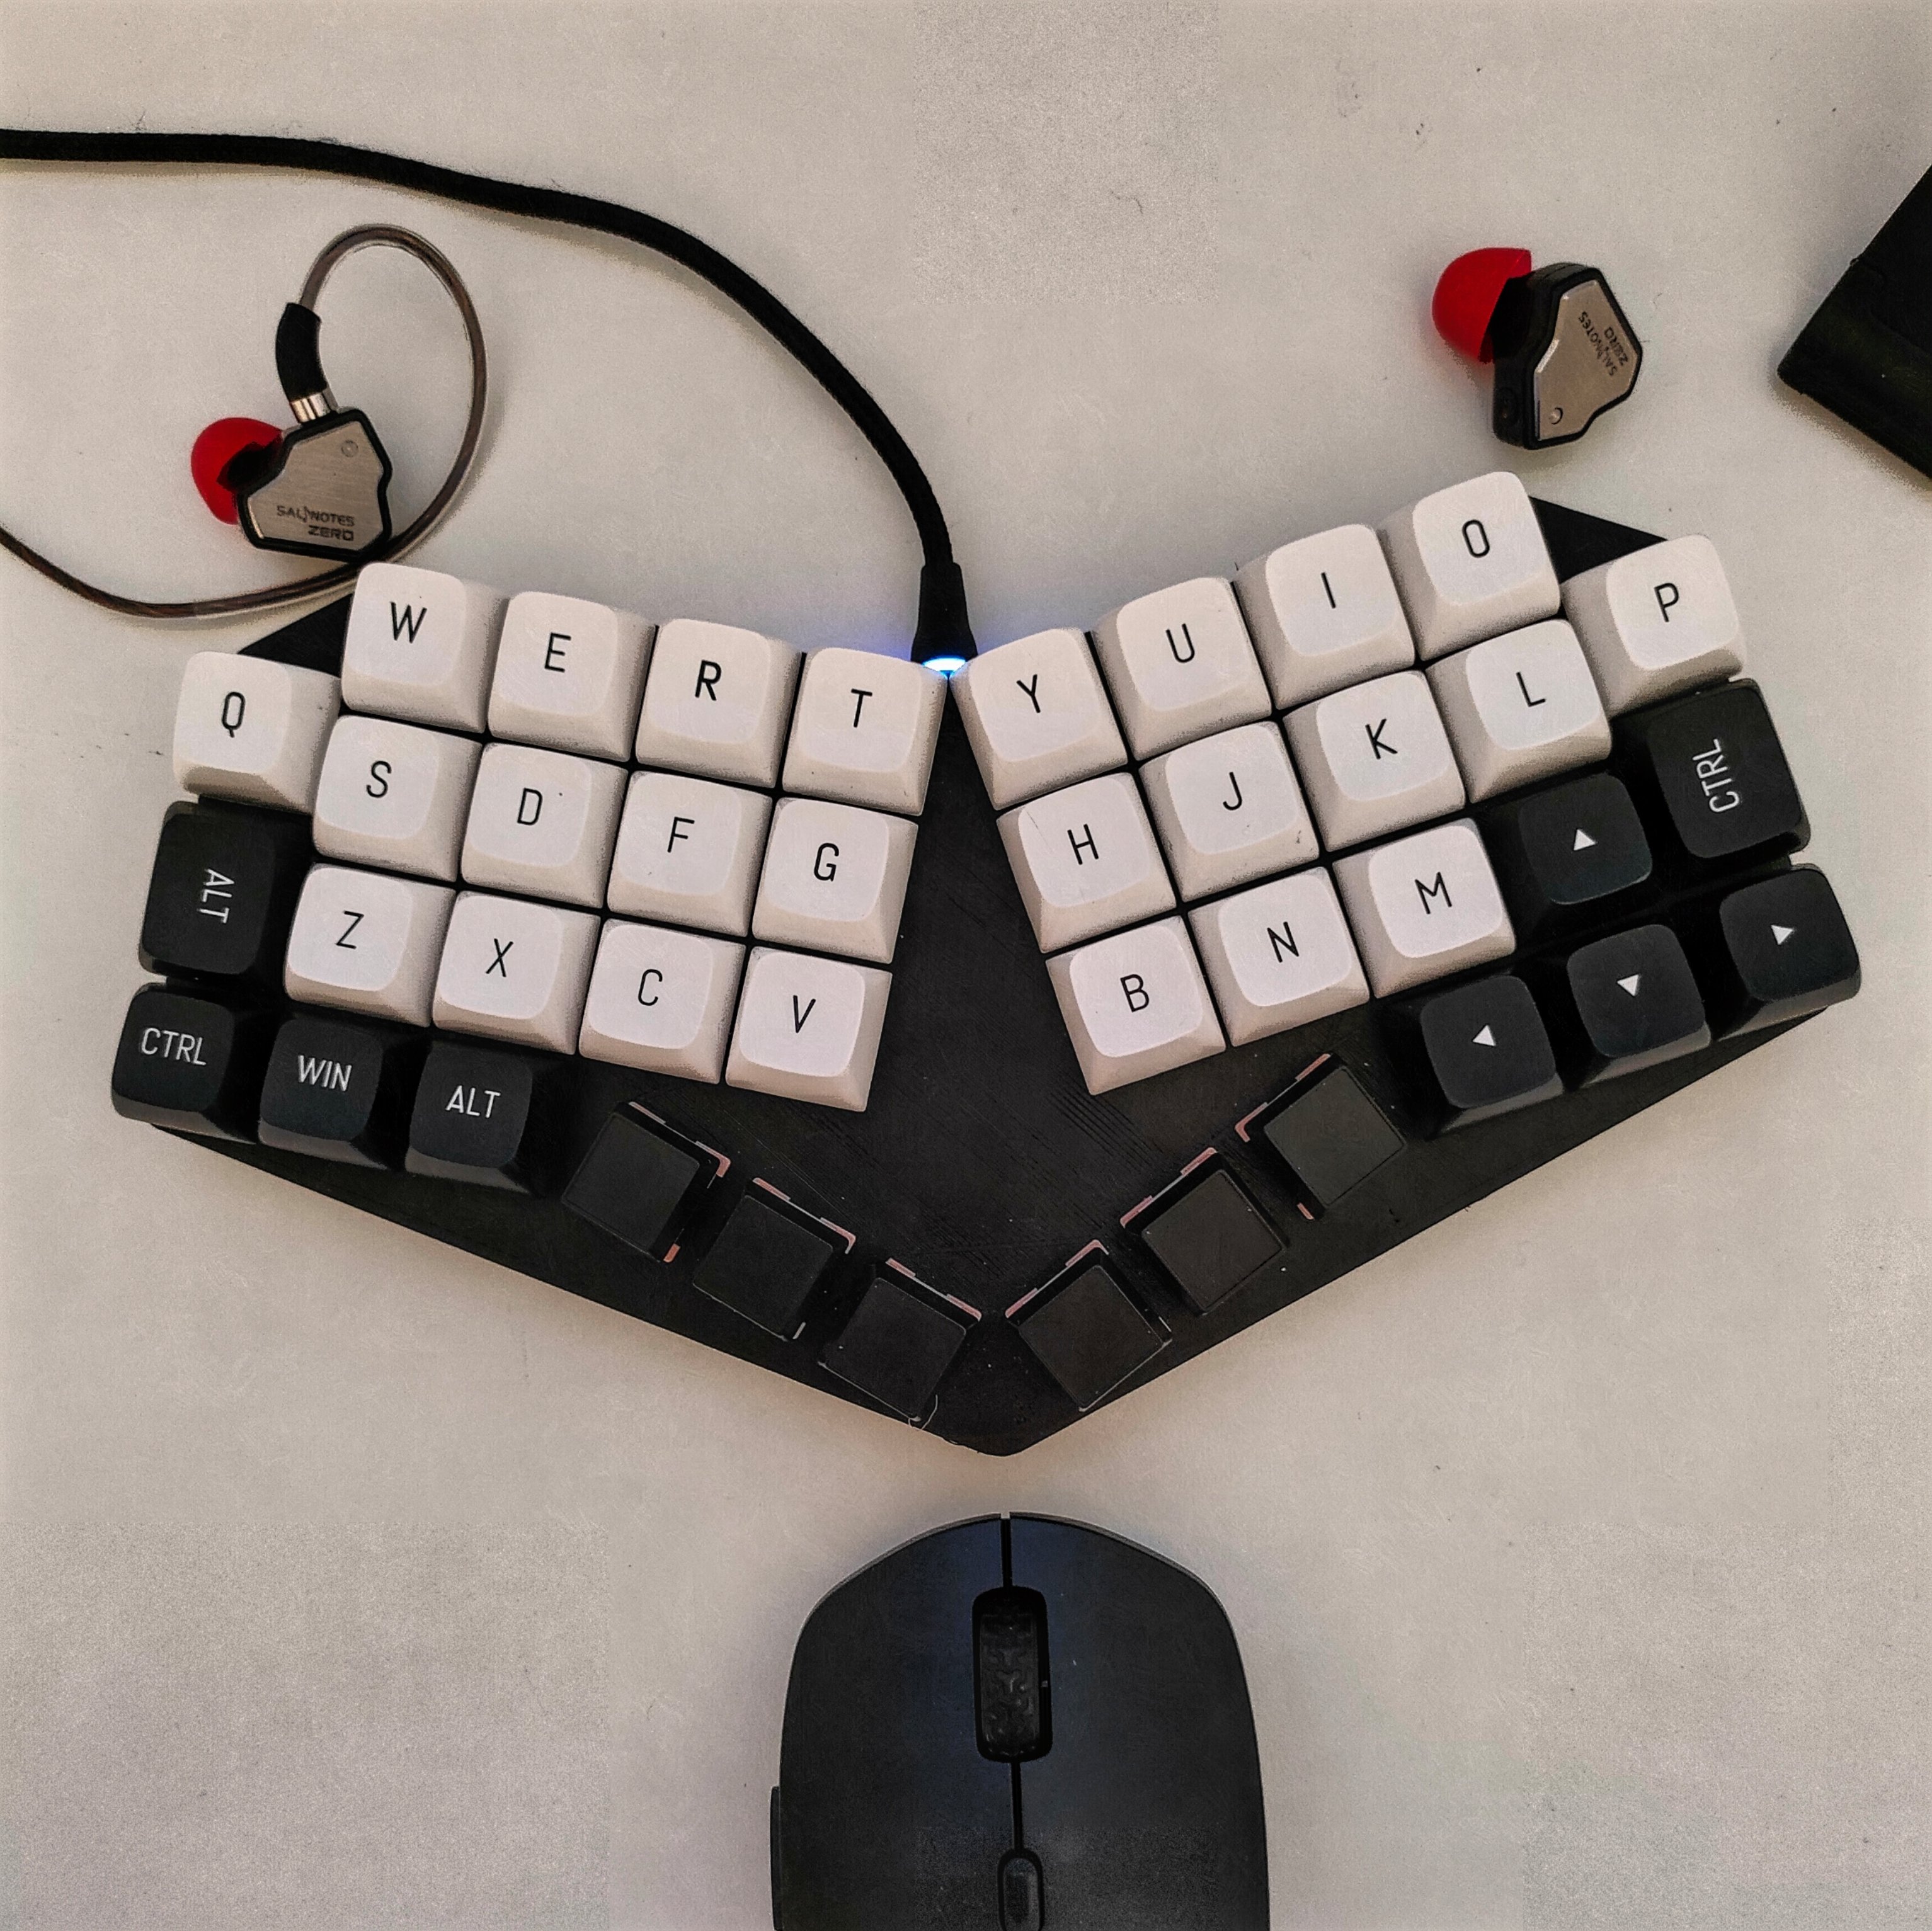
Remember the teaser I shared about the Vesuveus mechanical keyboard? Well, I’m thrilled to announce that it’s no longer just a concept - it’s a reality!

Since the initial teaser, I’ve been hard at work perfecting the design and building the first prototype. The white enclosure served as the starting point, but I couldn’t resist experimenting further. So, recently, I had a bit of spare time that I spent fixing some issues with the first white enclosure and printed this sleek black enclosure, which model you can find on the GitHub page!

But that’s not all! I’ve also uploaded a type test video on YouTube featuring the Vesuveus in action! You can witness the smooth, silent and satisfying keystrokes as I type away. Check it out here and let me know your thoughts!

Please keep in mind that I recorded the video with my smartphone, so the quality might not be top-notch, but I’m sure you’ll still get a good idea of the typing experience with the Vesuveus. Hope you will enjoy! 😄

If you’re curious to see the progress, all the details, and the newly updated 3D models, head over to the GitHub page. Feel free to explore, build your own Vesuveus, and join me in this exciting DIY mechanical keyboard journey!

ATM, the Vesuveus is a handwired board. Once I learn Kicad, I plan to work on the PCB version too! If you’re interested in getting started with handwiring, I highly recommend checking out Joe Scotto’s guides - that guy is amazing at what he does!

I can’t express enough gratitude for the incredible support and inspiration from this amazing community. Your works has fueled my passion for keyboards, and I’m thrilled to share this milestone with all of you.

Thank you for being a part of this journey, and let’s keep the keyboard magic alive together!

NYPariah,

Where’s the “a”?

Squirrel,
@Squirrel@thelemmy.club avatar

And any/all punctuation marks? Numbers, too, but we’re already well outside the realm of practicality…

Raffowo,
@Raffowo@lemmy.world avatar

They are all accessibile holding the thumb buttons, they are disposed on Two separate layers.

As I mentioned on the other answer, for the full layout you can consult the github Page!

apfel,
@apfel@lemmy.world avatar

Simple! Just copy them off the respective Wikipedia article 👍

Raffowo,
@Raffowo@lemmy.world avatar

Thats an alternative😂

Raffowo,
@Raffowo@lemmy.world avatar

That can be a bit confusing, as “a” I’m using the “Alt” on the left side (the One rotated by 90°)

On the github Page you can see the layout on the image where I mention the 40 Key layout

obosob,
@obosob@feddit.uk avatar

To speed up your PCB creation this board would be really quite easy to make in ergogen and that can spit out a PCB for you and all you’ll need to do is route it. Either way, it shouldn’t be too hard to make anyway.

One tip if you make it in kicad yourself from scratch. Set your grid size to a fraction of 19.05 (MX Spacing), start by laying out one half of the switches and then rotate them as a block, then do the same for the other half. that’ll make it much easier to work with than trying to place everything on an angle.

Good luck.

Raffowo,
@Raffowo@lemmy.world avatar

Thank you for the feedback!

Tbh, I saw ben vallack’s videos that used ergogen to build some keyboard - but I didn’t put that much effort trying to learn kicad; this Will be my excuse to try that out! At the same time, Joe scotto tempted with his guide to handwiring and it felt like a breeze, but It Is a time consuming process that can lead to a lot of problems if It isn’t used a good soldering iron.

Still thank you for the tip on the grid size and angles! Surely Will Speed up the process

Blaze,
@Blaze@sopuli.xyz avatar

Nice board!

Raffowo,
@Raffowo@lemmy.world avatar

Thank you so much!

I think that atm Is in a good shape but There Is a lot more that can be done!

  • All
  • Subscribed
  • Moderated
  • Favorites
  • ergomechkeyboards@lemmy.world
  • fightinggames
  • All magazines